
How to Remove Scratches from Stainless Steel
The secret to an invisible stainless steel repair is not the abrasive you use. It is the scratch pattern you leave behind. A scratch is visible because it reflects light differently than the surface around it. Remove the scratch but leave the wrong pattern, and you trade one visible mark for a bigger one. So the rule behind every repair on this page is simple: your repair must copy the scratch pattern of the metal around it. Brushed stainless has a linear grain, so a repair there must be re-grained in the same direction. Welds, edges and non-directional surfaces are the opposite: there, a flap wheel's random, non-directional pattern is what makes the work disappear. Get the pattern right and the repair vanishes. Get it wrong and even a perfectly smooth repair shows up as a bright patch every time the light moves.
Step 1: read the finish
Look at the metal at a low angle in good light. If you see fine parallel lines running one way, which is the standard finish on refrigerators, dishwashers, range hoods, sinks and architectural panels, you have brushed (grained) stainless, and every abrasive stroke you make must run with those lines. If the surface shows no direction at all, such as a matte blasted panel, a mill finish, a weld zone or a machined edge, you have a non-directional surface, and a directional repair would stand out like a stripe. Mirror-polished stainless is a third case: it has no scratch pattern to copy, only a shine to restore, and that means a full polishing sequence rather than a blend. This one observation decides every tool and motion that follows, which is why it comes before anything touches the metal.
Step 2: gauge the depth
Drag a fingernail across the scratch, perpendicular to it. If the nail glides over, it is a surface mark that fine abrasives will blend quickly, usually in minutes. If the nail catches, the scratch has real depth, and you will need to level the surrounding metal down to the bottom of it with a grit progression before rebuilding the finish. Deep gouges that catch hard may be beyond blending on thin appliance panels: appliance skins are often under a millimeter thick, and leveling a deep gouge can create a visible low spot or an oil-canned dent that looks worse than the scratch. On thick material like sink basins, worktops and fabricated parts you can work much more aggressively. Blend what the panel can afford and stop while it is still flat.
What you need
| Item | Use |
|---|---|
| Degreaser or dish soap | Clean before sanding so oils are not ground in |
| Fine non-woven abrasive pad | Light scratches and final graining on brushed finishes |
| Wet/dry paper, P240 to P400+ | Leveling deeper scratches, always with the grain |
| Sanding block or firm sponge | Keeps pressure even so you do not dish the panel |
| Flap wheel, P150 to P240 | Welds, edges, non-directional surfaces, full-panel satin finishing |
| Masking tape | Protect trim, gaskets and neighboring surfaces |
One rule above all: every abrasive that touches stainless must be stainless-only. A pad, paper or wheel that has touched carbon steel carries embedded particles that will bloom into rust spots on your repaired surface days later. Mark your stainless abrasives and store them separately.
Fixing scratches on brushed stainless (appliances, panels)
- Clean the area with a degreaser and dry it fully.
- Find the grain direction and plan strokes that run the full length of the panel section. Short strokes leave visible start and stop marks, so work fence post to fence post, not just over the scratch.
- Light scratches: rub a fine non-woven pad along the grain, never across it, using light and even pressure. Check every few passes at a low angle. Most surface marks disappear within a few minutes of this.
- Deeper scratches: wrap P240 wet/dry paper around a block, keep the surface wet with a little water or window cleaner, and sand only with the grain until the scratch is gone. Then step to P320 and P400, and finish with the non-woven pad to restore the satin sheen.
- Re-grain past the repair: feather your strokes well beyond the damaged spot so the new grain fades into the old instead of ending at a visible border.
- Match the sheen, not just the smoothness. If the repair looks shinier than the panel, the last pass was too fine. Go back one step and finish there. If it looks duller, the last pass was too coarse, so move one step finer.
Sinks and cookware
Sink basins are thick, so you can start more aggressively, and most sinks have a semi-random swirl or fine grain that a non-woven pad reproduces easily. Work the whole basin rather than one spot so the finish stays uniform, then rinse thoroughly. Cookware is the same metal with one extra rule: after any abrasive work on a food surface, wash it with soap and water and wipe with vinegar or a passivating cleaner so the surface re-forms its protective chromium oxide layer before use. Scratches inside cookware are cosmetic and do not make the pan unsafe, so on cooking surfaces it is usually better to leave shallow marks alone.
Welds, edges and non-directional surfaces: the flap wheel pass
This is where the flap wheel earns its place, and it is the part most scratch-removal guides get wrong by recommending a grinder. A grinding disc or belt cuts in one direction and leaves parallel lines that catch the light, and on stainless the eye picks out straight lines instantly. A flap wheel's dozens of overlapping flaps strike the metal at constantly changing angles and leave a random scratch pattern that scatters light evenly, so the repair melts into the surface instead of drawing a line across it. Work at P150 to P240 with light pressure, keep the wheel moving, and vary your direction on purpose. The randomness is the finish. This is the same reason fabrication shops make their final pass over deburred edges and blended welds with a flap wheel rather than a grinder: a flap wheel hides its own tracks. The complete weld workflow, from crown knockdown to the invisibility pass, is in weld blending.
Satin-finishing a whole panel
When a panel is too far gone to spot-repair, or a fabrication needs a uniform satin finish before delivery, refinish the whole face. On grained work, run a fine flap wheel or non-woven wheel in straight, overlapping, full-length passes in one direction to lay down a consistent new grain, keeping the tool moving at a steady rate so no section burns brighter than its neighbors. On non-directional work, keep the passes varied instead. Either way the principle holds: decide the pattern first, then let every stroke build it.
What ruins stainless repairs
- Steel wool and carbon-steel wire brushes: they embed carbon steel particles that later bloom into rust spots.
- Any abrasive that has touched carbon steel. Keep dedicated wheels and pads for stainless only.
- Sanding across the grain on a brushed finish: one cross-grain stroke can take longer to fix than the original scratch.
- Coarse grinding discs: they overheat thin panels, leave heat tint, and cut deep linear gouges.
- Skipping grits: each grit must fully replace the scratches of the one before it, or the coarse lines reappear the moment the light hits them.
- Sanding a coated panel. Some appliance fronts are clear-coated or are stainless-look film over steel. Test in a hidden corner first: if fine sanding produces powdery residue rather than a metal sheen, it is coated, and abrasives will destroy the finish.
Keeping it scratch-free afterward
Wipe brushed stainless with the grain using a microfiber cloth, clean with dish soap or a dedicated stainless cleaner rather than scouring powders, and never let chloride cleaners like bleach sit on the surface, because chlorides attack the passive layer and invite pitting that no amount of sanding fixes cleanly. A light coat of stainless polish or mineral oil evens out the sheen after a repair and makes fingerprints easier to remove.
Tools for the job
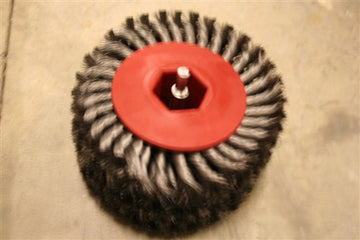 Twisted Steel Brush for Drill - 2" or 4" Wide$187.00+
 Quick Strip 2" Replacement Abrasive Strips$52.00
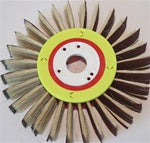 Quick Flex 2" × 10" Flap Wheel - For Moldings & Tight Profiles$79.00
Shop: 2" drill flap wheels · 4" drill flap wheels · P240 flaps · P320 flaps · metal deburring guide
Common Questions
Can you really remove scratches from stainless steel?
Yes. Stainless is solid metal with no coating, so the finish can be re-created with abrasives. Light scratches blend out with a fine non-woven pad worked with the grain; deeper ones need a grit progression from P240 up, followed by re-graining. The repair is invisible when the new scratch pattern matches the old one in direction and sheen.
What grit sandpaper removes scratches from stainless steel?
Start at P240 wet for scratches a fingernail catches on, then step through P320 and P400 and finish with a fine non-woven pad to match a brushed finish. For surface marks the nail glides over, skip the paper entirely and use only the non-woven pad. Coarser than P240 is rarely needed on appliance panels and risks cutting more than you can blend back.
Why does my repair show even though the scratch is gone?
Because the repaired spot reflects light differently. Usually the pattern runs the wrong direction, the sheen is shinier than the panel, or the repair ends at a hard border. Re-grain with the grain, finish one grit coarser to kill the shine, and feather well past the repair zone.
When should I use a flap wheel on stainless?
On welds, edges and non-directional surfaces, where its random, non-directional scratch pattern hides the work, and for laying a uniform satin finish across whole panels. On a brushed appliance panel, spot-repair by hand with pads and paper worked with the grain instead, since a spinning wheel used carelessly there can cut across the grain.
Will WD-40, baking soda or polish remove scratches?
Polishes and home remedies can mask hairline marks by filling and brightening them, but they do not remove metal, so the scratch returns as the product wears off. A true repair re-creates the finish with abrasives.