
Weld Blending: How to Blend Welds So They Disappear
Weld blending means taking a finished weld bead down flush with the parent metal and feathering the transition so the joint looks like one continuous surface. The welding is what holds the part together. The blending is what makes it sellable. And the difference between a blend that disappears and a blend that announces itself is not how flat you get the bead, it is the scratch pattern you leave behind. A grinder levels a bead fast, but it exits leaving parallel scratch lines that catch the light, so the eye finds the repair instantly. A flap wheel's overlapping flaps cut at constantly changing angles and leave a random, non-directional pattern that scatters light, so the blended zone melts into the surrounding metal. The professional workflow uses both: heavy removal with the fast tool, final passes with the tool that hides its own tracks.
Before you touch the weld
One check first: is this weld structural, code welded, or subject to inspection? Blending removes material, and on structural and pressure work the weld profile may be part of the approved design. On anything load bearing, certified, or inspected, get sign-off before blending. Everything on this page assumes cosmetic and general fabrication work: frames, enclosures, railings, furniture, brackets, panels and trim, where the goal is a clean surface ready for coating or display.
Why shops blend welds at all
Three practical reasons. Appearance is the obvious one: on architectural metalwork, food service equipment, railings and custom fabrication, a proud bead reads as unfinished. Coating quality is the second: paint and powder coat lay down thinner over a sharp bead profile and pull back from abrupt edges, so a blended, radiused transition holds coatings better and longer. Handling is the third: a blended joint has no ridge to catch gloves, cloths or the next part in the stack. The same logic that drives edge deburring drives weld blending, and the same tools do both jobs.
The four-stage blend
- Knock down the crown. If the bead stands well proud, take the bulk off with your fastest appropriate tool. On heavy beads that is honestly a grinding disc or belt, used carefully and stopped just proud of flush. On smaller TIG and MIG beads, a P60 to P80 flap wheel handles the whole knockdown on its own. Either way, stop before you reach the parent metal. The last bit of height belongs to the next stage.
- Blend flush. Switch to a P80 to P120 flap wheel and work the bead down level, letting the flaps ride across the joint so the abrasive bridges bead and parent metal together. Keep the wheel moving in overlapping strokes and check flatness by dragging a straightedge or your fingertip across the joint. The flaps flex, which is exactly what you want here: they shave the high spots without digging a hollow beside the weld the way a rigid disc edge can.
- Feather wide. Widen your passes well beyond the weld zone, two to three times the bead width on each side, at P120 to P150. A blend that ends at a hard border is visible even when it is perfectly flat, because the surface texture changes in a straight line. Feathering spreads the transition until there is no line for the eye to find.
- Finish for invisibility. This is the pass that decides everything. On a non-directional surface, run a P150 to P240 flap wheel with light pressure and deliberately varied direction, and let the random scratch pattern make the blend disappear. On brushed stainless, do the opposite: finish by re-graining in the direction of the existing grain so the blend matches its surroundings. The rule is the same one from our stainless guide: your repair must copy the scratch pattern of the metal around it.
Grit sequence for weld blending
| Stage | Grit | Tool note |
|---|---|---|
| Crown knockdown, heavy beads | P36 to P60 | Grinder or belt acceptable here; stop proud of flush |
| Knockdown, light TIG/MIG beads | P60 to P80 | Flap wheel handles it start to finish |
| Blend flush and feather | P80 to P150 | Flap wheel; overlapping strokes, no pressure |
| Invisibility pass | P150 to P240 | Flap wheel; varied direction, or with the grain on brushed stock |
Heat is the enemy
Every stage of blending puts heat into the joint, and heat is what turns a good blend into visible damage. On stainless, too much heat leaves straw and blue tint around the weld zone that no amount of further sanding hides cleanly. On thin sheet, heat warps the panel. The fixes are all technique: light pressure, keep the tool moving, take more passes instead of harder ones, and let the part cool between stages. A flap wheel helps here too, because its flexible flaps cut with far less pressure and friction than a hard disc leaned into the work. If you see color appear on stainless, stop, cool, and back off the pressure before continuing.
Blending stainless welds
Stainless adds two rules on top of everything above. First, contamination: every abrasive that touches stainless must be stainless-only. A flap wheel that has worked carbon steel carries embedded particles that rust as spots along your blended joint days later, and there is no fixing that except re-doing the blend. Mark your stainless wheels and keep them separate. Second, the finish match: most stainless fabrication carries a brushed grain, so the final pass must re-establish that grain through the blend zone, running full-length strokes in the grain direction well past the weld. The complete finish-matching method, including sheen matching and what ruins stainless repairs, is in how to remove scratches from stainless steel.
Aluminum welds
Aluminum blends fast, which is both the advantage and the trap. Use light pressure and fresh, sharp abrasive so the flaps cut instead of rubbing, because dull abrasive on aluminum smears and loads. Clean the wheel often or step to a fresh one when you feel the cut rate drop. Aluminum oxide flap wheels handle aluminum well, and the low-pressure flap action is much more forgiving on soft alloys than a rigid disc, which can dig in before you feel it happening.
What ruins a weld blend
- Digging a hollow beside the weld. Rigid discs held at an angle cut a trench next to the bead. Once the parent metal is below flush, the only fix is blending an even wider area.
- A hard border. Flat is not enough. If the texture change ends in a line, the blend shows. Feather two to three bead widths past the joint.
- The grinder finish. Leaving the final surface with parallel grinder scratches is the most common giveaway. The last tool on the metal should be the flap wheel, not the grinder.
- Heat tint on stainless from pressure and dwell time. Light passes, keep moving, let it cool.
- Cross contamination from abrasives shared between carbon steel and stainless.
- Skipping grits. Each stage must fully replace the scratches of the stage before it, or coarse lines telegraph through the finish coat.
Tools for the job
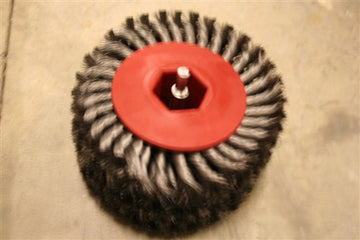 Twisted Steel Brush for Drill - 2" or 4" Wide$187.00+
 Quick Strip 2" Replacement Abrasive Strips$52.00
 Quick Flex 2" × 10" Flap Wheel - For Moldings & Tight Profiles$79.00
Shop: 2" drill flap wheels · 4" drill flap wheels · F3 air tool · grit guide · metal deburring guide
Common Questions
What is the best tool to blend welds?
For the bulk removal on heavy beads, a grinder or belt is fastest. For the blend, feather and finish passes, a flap wheel at P80 to P240 wins, because its flexible flaps level the joint without trenching the parent metal and its random scratch pattern hides the work. The last tool on the metal should always be the flap wheel.
How do you blend a weld so it is invisible?
Knock the crown down to just proud of flush, blend level with a P80 to P120 flap wheel, feather two to three bead widths past the joint, then make a finishing pass that copies the surrounding scratch pattern: varied-direction passes for a random finish, or strokes with the grain on brushed stainless. Flatness hides the bead; matching the scratch pattern hides the blend.
Can you blend welds on stainless steel?
Yes, with two extra rules: use abrasives that have never touched carbon steel, and finish by re-graining in the direction of the existing brushed finish. Keep heat down with light pressure and constant movement so the weld zone does not tint.
Should every weld be blended?
No. Blending removes material, so structural, code and inspected welds should only be blended with engineering sign-off. Cosmetic and general fabrication welds on frames, enclosures, railings and panels are the normal candidates.